


Salesforce Marketing Cloud (formerly Exact Target before Salesforce acquired it) is used by Admissions to send mass emails to lists. These lists are imported into SFMC, creating contacts. From time to time our Salesforce account rep will inform us that we are over our contact allowance. The only native way to delete contacts is one by one (OK, 25 by 25)--not ideal when there are 144K contacts and our allowance is 85K. This article shows how to perform a mass deletion of contacts.
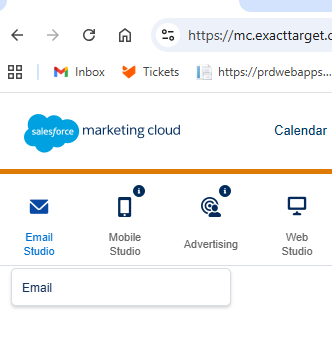
The first step is to obtain a CSV file of contacts to delete. Admissions might have some other criteria in mind, but the most recent mass deletion included all contacts that had not received an email through SFMC for the past 90 days. To get this list, log in to SFMC (details in KeePass under the Salesforce node). Hover over Email Studio and click on Email:
Hover over Tracking and click Reports:
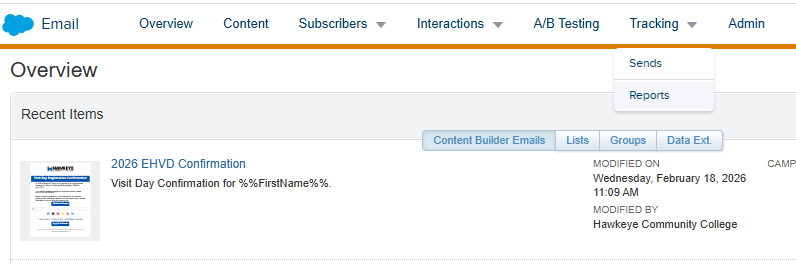
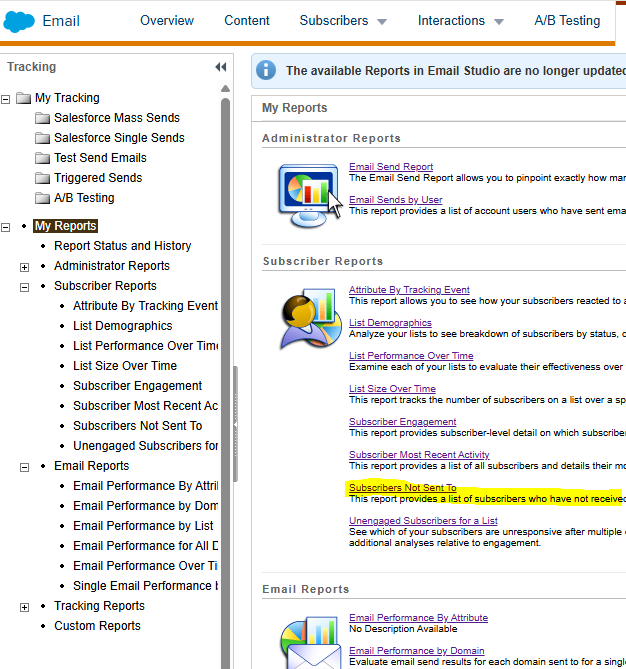
Click on the report "Subscribers Not Sent To":
Pick a start date 90 days previously for the Start Date, today's date for the End Date, and then click All Subscribers in the List options:
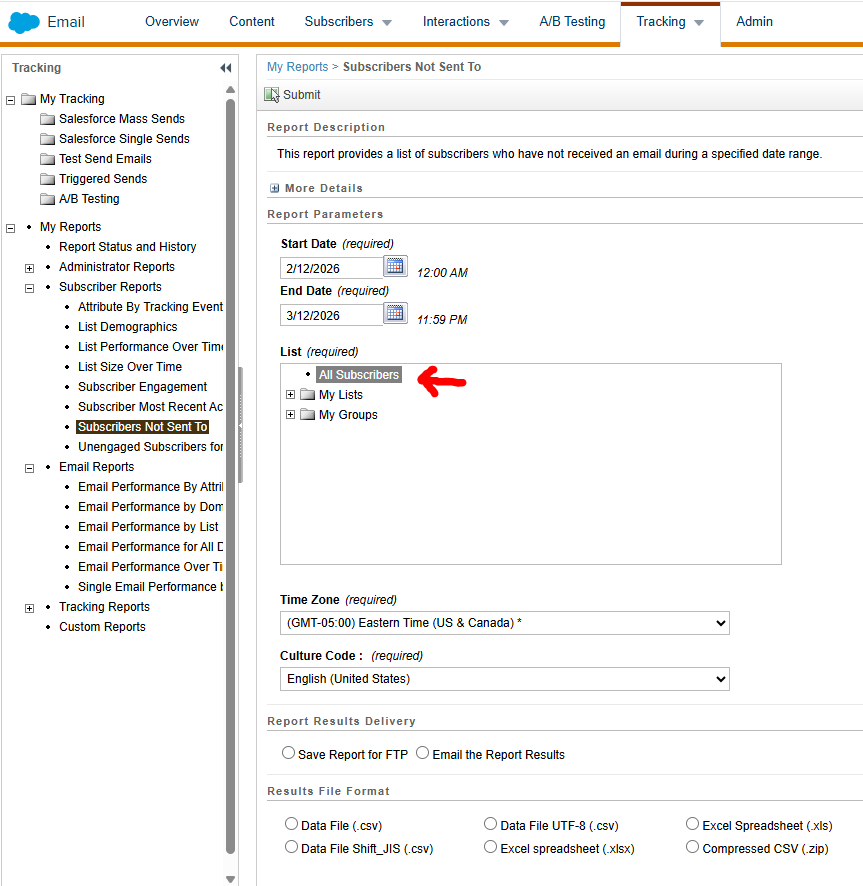
Pick the time zone, leave Culture Code at English (United States), pick a delivery method (I use email). For the file format, choose Data File UTF-8 (.csv). Pick Run Report Immediately, because there's no reason to put it off. The report will be scheduled to run in the very near future. Both times I ran this, the report was scheduled to run within the next two minutes. It also appeared to be scheduled for an hour later; I'm not sure if it's defaulting to Eastern time, or because they have our account set to "Central not observing Daylight Saving Time". Either way, it will run in the next minute or so.
Save the file to the shared Google Drive. This should be G: but your mileage may vary. The complete path and file name is
G:\Shared drives\Enterprise Apps Secure\Salesforce\SFM Delete Contacts\subscribers_not_sent_to.csv.
Open up the file in Notepad++. Delete all the leading lines until the header "EmailAddress":

Ensure the encoding is UTF-8 and not UTF-8-BOM.
Open a command prompt and change to the directory G:\Shared drives\Enterprise Apps Secure\Salesforce\SFMC Delete Contacts. Check that you have Python 3 installed on your workstation:

You'll need to have the Python requests library installed, so from the prompt issue "pip install requests". Once that completes, look in the directory referred to above. Remove any files other than smfc_del.py and the CSV file you just saved there. Once you have only those two files in the directory, you're ready for the deletion.
sfmc_del.py is a small Python script that reads the email addresses from the file you saved, sends queries for SubscriberKeys associated to those emails to the SFMC API via SOAP requests, then sends SOAP queries to the API, checking each SubscriberKey to see if it has received any mailings in the previous 90 days. It keeps track of its progress in text files along the way, so if it should be interrupted, merely kicking off the script again will allow it to pick up at the point it was interrupted. That's the default behavior; if you want to force it to start over again, use the --fresh flag.
If Admissions wants to spot-check the contacts that will be deleted, you can do a dry run of the deletion. Issue the command "sfmc_del.py --dry-run". The script executes and creates a file in the same directory named dry_run_summary.csv. It will look very similar to the file you got from the SFMC report.
When you are ready to do the deletion, issue "sfmc_del.py --delete". The script will write a file to the directory called deleted_contacts.csv. The deletions are asynchronous, so it may take 24 hours to see a drop in the number of contacts.
Troubleshooting
500 error
The most common problem I've come across is the SFMC server experiencing internal server (500) errors. I've added increasingly robust error handling for this, but seems that once the 500 error is generated, the server doesn't recover, the script gets an unhandled error and crashes. It also, fortunately, keeps track of its progress, so just run the script again and it will pick up where it was when it encountered the error.
403 error
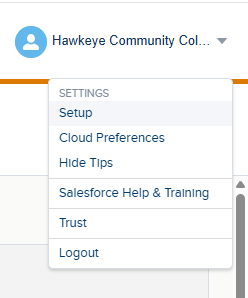
If the script reports a 403 error, it may be that the client secret is no longer valid. (05/19/26 update: This is almost certainly going to be the case. Salesforce is now enforcing the expiration of client secrets 180 days after creation.) You'll have to create a new API integration package. Log in to SFMC and pick Setup from the Hawkeye avatar in the upper right corner:
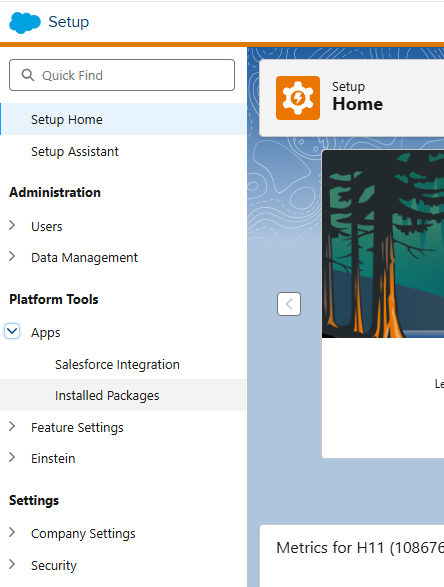
From the navigation pane on the left, expand Apps and click Installed Packages.
Click the New button in the upper-right corner. Give it a unique, descriptive name and click Save. Click Add Component. Make sure API Integration is selected and click Next. Select Server-to-server and click Next. Give the following permissions:
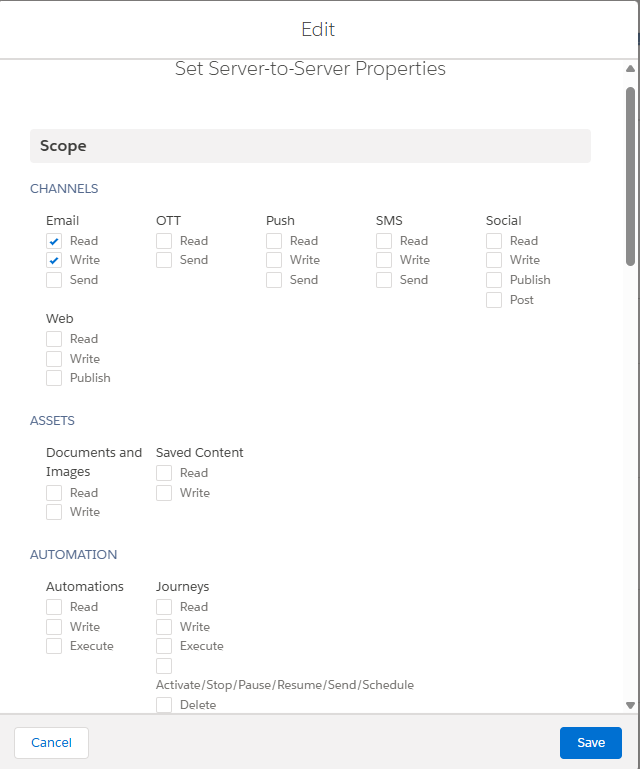
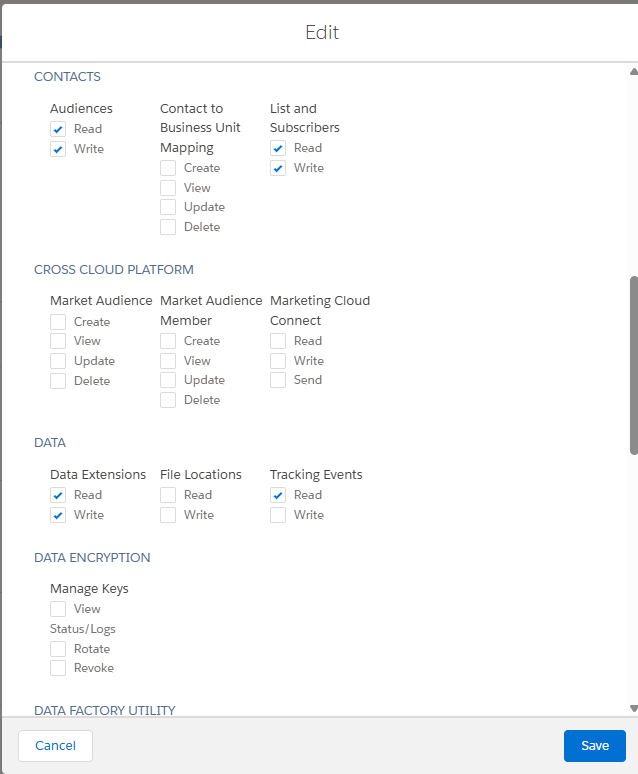
Those are on the same screen. Don't click Save until you've set all nine permissions. None of the permissions after the Data section are granted.
VERY IMPORTANT: On the next screen, copy the client secret and save it to a secure location:
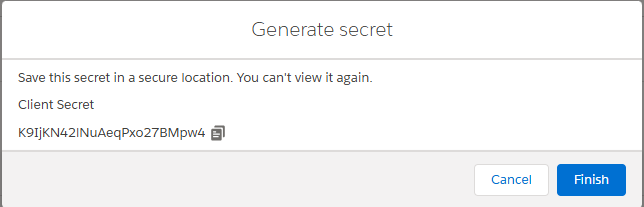
You won't see it again.
Navigate to G:\Shared drives\Enterprise Apps Secure\Salesforce\SFM Delete Contacts and open sfmc_del.py in Notepad++. You're going to update these last three lines:

In the most recent version of the script, these are on Lines 47, 48 and 49. CLIENT_SECRET may have a value for it already; replace it with the one you very importantly copied above. CLIENT_ID and AUTH_BASE_URI are listed in the details for the package you just created:
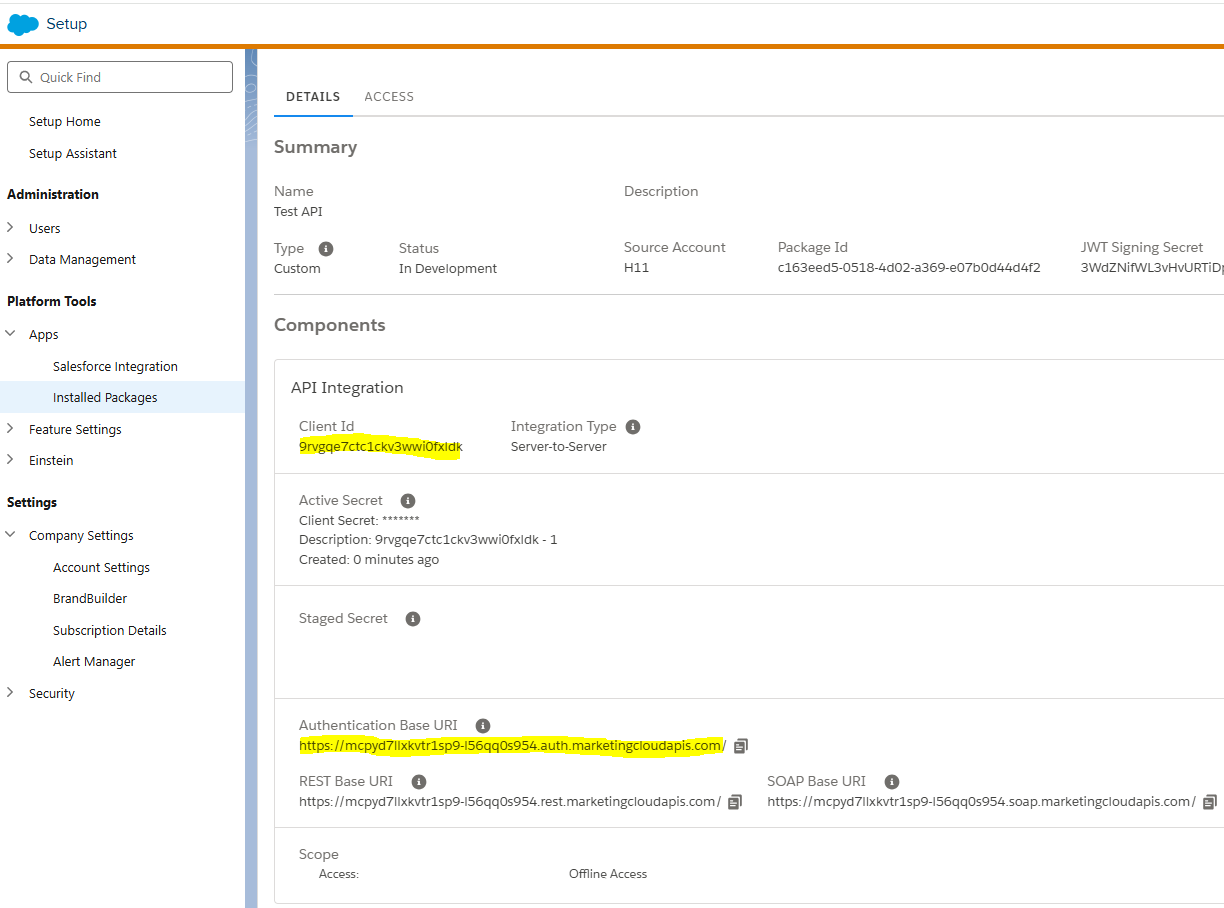
The value for AUTH_BASE_URI probably hasn't changed or you would have gotten a 404 instead of a 403, but no harm in replacing it, just in case. Save the file and close it. Do a dry run following the directions above. If it's successful, go back to SFMC > Setup > Apps > Installed Packages. Open API Contact Deletion and click the Delete button in the upper-right corner. Then open the package you just created, click Edit Package Details, and change the name to API Contact Deletion.
400 error
If the script is reporting a 400 error (bad request), it's likely that Salesforce has changed the version of SOAP their API will accept from 1.1 to 1.2. You'll need to update how the headers and payload for the request are constructed (currently lines 109 and 130, respectively). Good luck with that, and godspeed.
404 error
If the script is reporting a 404, it's possible that the SOAP URI has changed. Check in the package details to see if the Authentication Base URI matches the script's AUTH_BASE_URI. If they are different, update the script. If they're the same, I'm guessing that Salesforce changed the URI but packages don't automatically update. You'll have to create a new API integration package following the instructions above and update the script with the new client ID, client secret and authentication base URI.

